📊
Taysta
  • Introduction
  • Support
  • GET STARTED
    • Requirements
    • What’s Included?
  • DOWNLOAD AND INSTALLATION
    • Download
    • Install Theme and Active
    • One Click To Import Demo
  • CONTENT MANAGEMENT
    • MainMenu
    • Header
    • Footer
    • Set up Homepage
    • Blog
  • SETTING
    • Plugins
    • Elementor
      • Elementor config
      • Opal Revolution Slider
      • Opal heading
      • Opal Testimonials
      • Opal Team Box
      • Opal Image Gallery
      • Opal Posts Grid
      • Opal Video
      • Opal Image Layers
      • Opal Brands
    • Create Newsletter
    • Create Contact Page
    • Customize
    • Template
  • FAQS
    • How long time get Support
    • How To Submit Ticket
  • RECOMMENDATION
    • Optimize Wordpress
    • Translation
Powered by GitBook
On this page

Was this helpful?

  1. SETTING

Create Contact Page

PreviousCreate NewsletterNextCustomize

Last updated 5 years ago

Was this helpful?

1. Create Contact Form.

Make sure you install and active Contact Form 7 plugin to continue reading.

Step 1 - Log in to your WordPress Dashboard, go to Contact > Add New

Step 2 - Give a Name to your form and change Mail Info
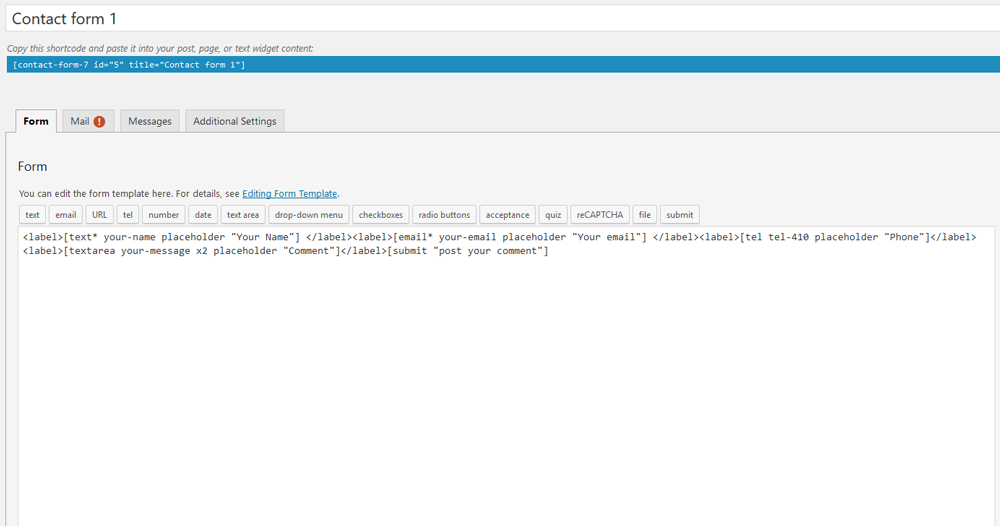
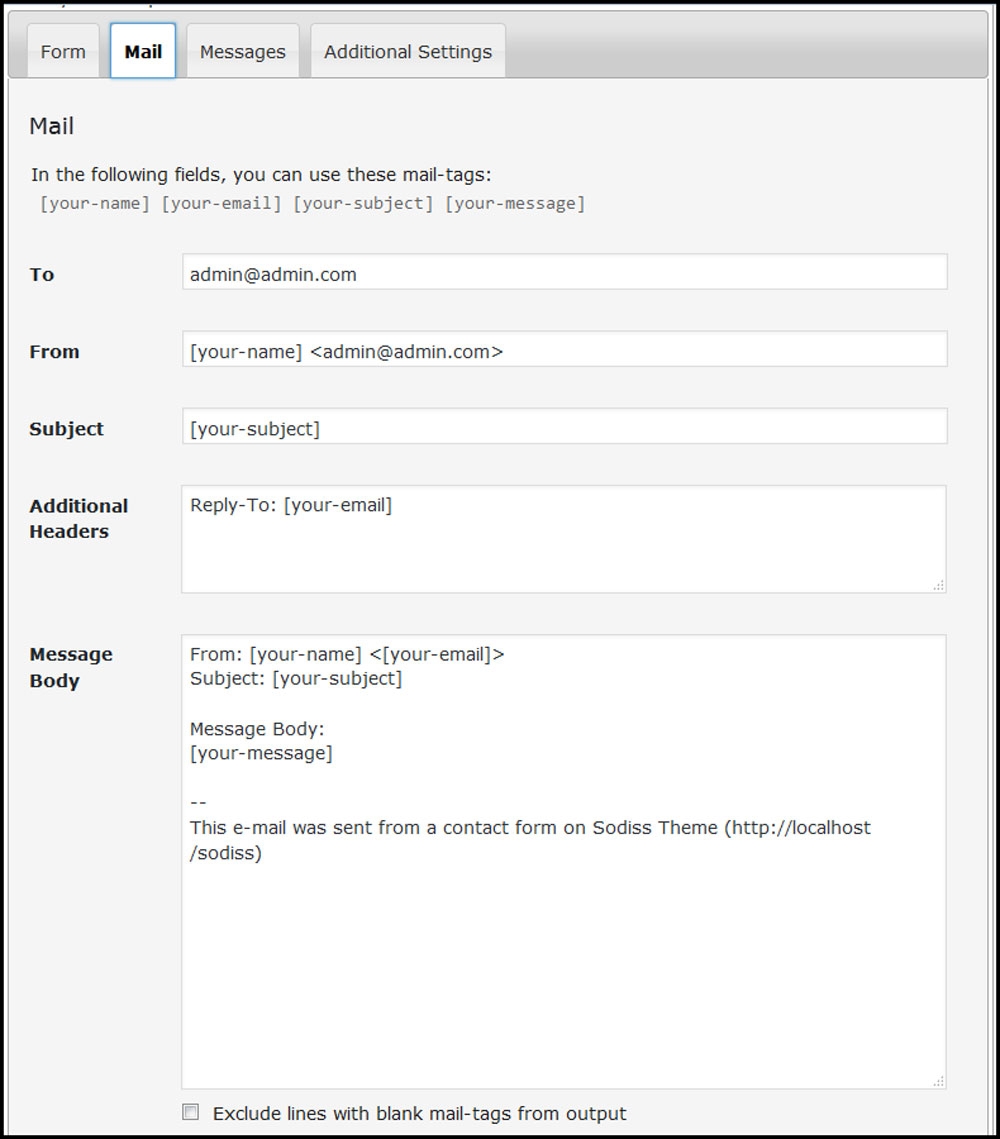
Step 3 - Edit the Form field to change the Form Layout
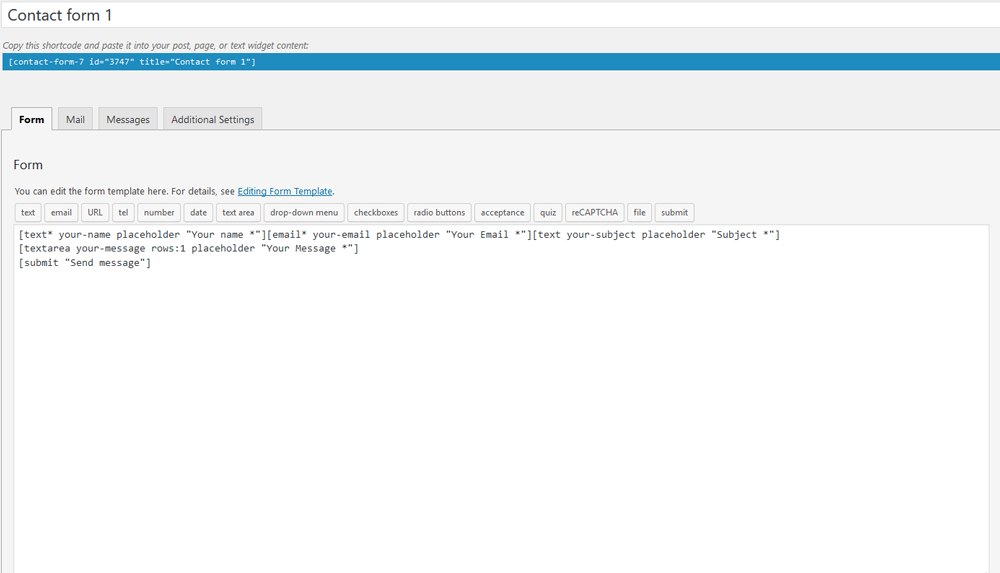
2. Create Contact Page

Step 1 - Log in to your WordPress Administration Panel (Dashboard). Step 2 - Click on Pages > Add New. Step 3 - Give your page a name then Change the Editor to Backend Editor ( you need to have the Elementor plugin activated ). Step 4 - Click on the Add Element button

Step 5 - Select the Contact Form 7 element.

Step 6 - The Contact Form 7 Settings should appear. Select the Form you want to use you can also customize the Color and change the fields layout and button design Step 7 - Update / Publish your page