Creating Layout
First click on the plus button to add a section.

After adding a new section, you can hover over these draggable buttons. In our builder, you can easily move or change the position of the section elements by dragging.
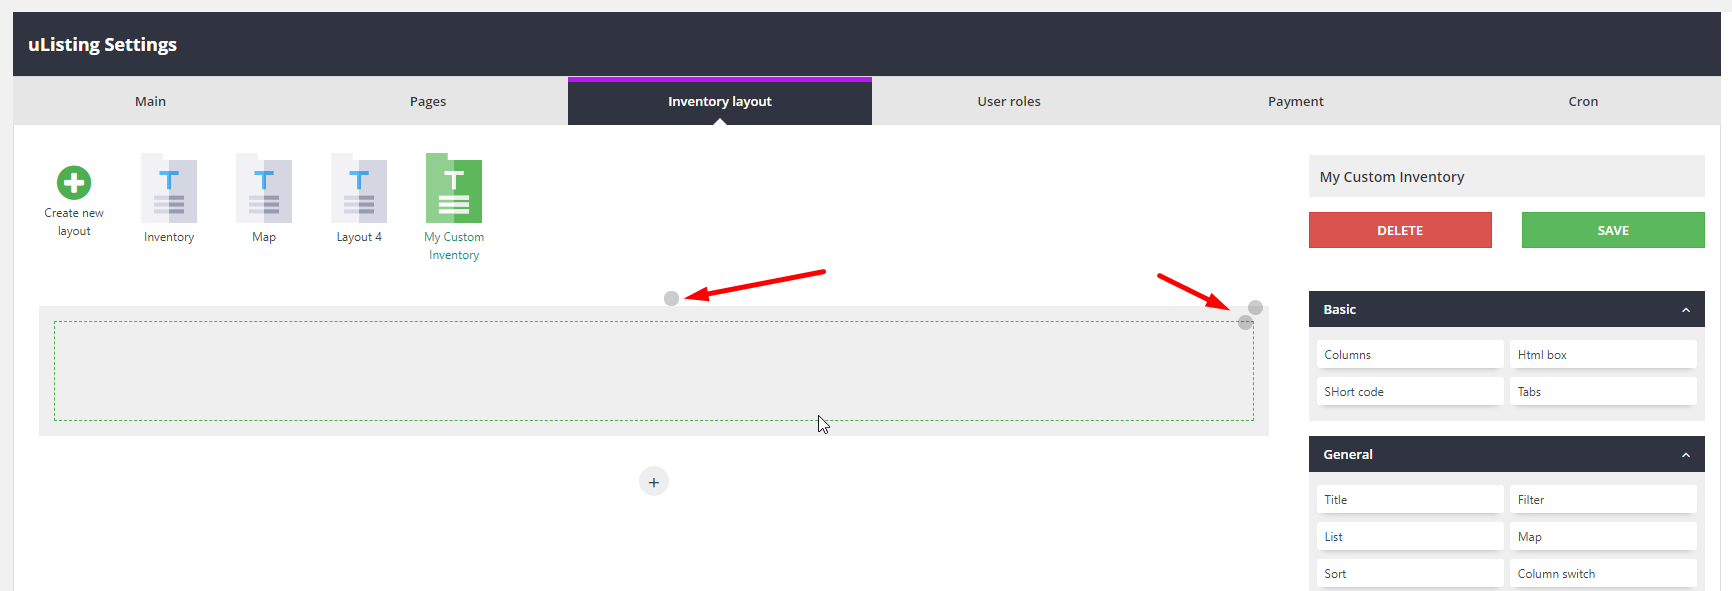

Each section has three buttons (Edit section, Move section, Delete section).
In the "Edit Section" you can change the section styles, such as the background color, and also make the full width or you can set indents for adaptive.

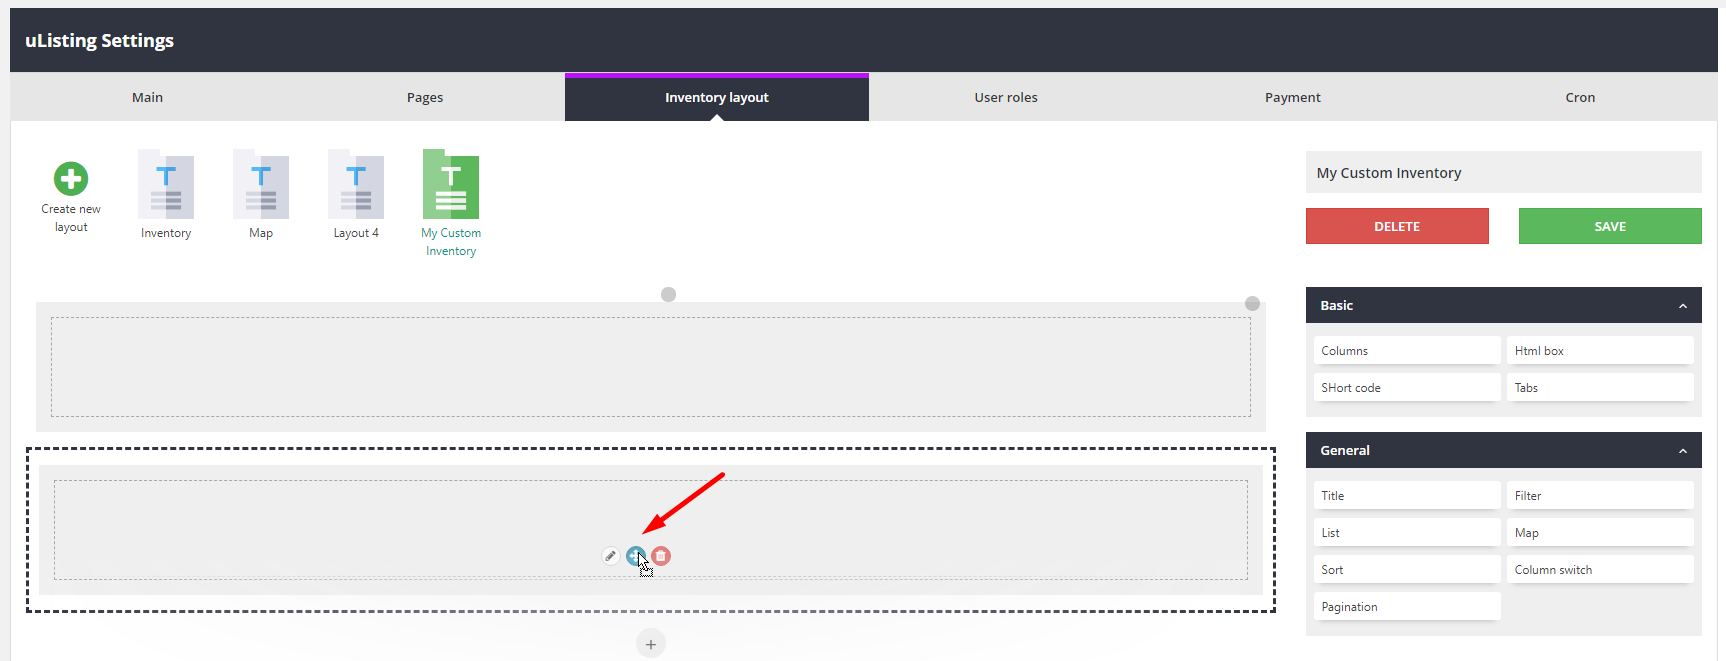
In the "Move Section" you can swap this section with other sections by drag and drop. For example:

Hover over this button and hold the left side of the mouse and move.
Each section has a row, and each row has a column. With this structure, you can create any type of layout. It is like a Grid system. About the Grid System you can find more information here: https://getbootstrap.com/docs/4.1/layout/grid/. Ok, let's create a custom layout. We will add a new section, then we will use general and basic elements to create a layout template. Here we will use columns first. Then there are other elements in the columns.
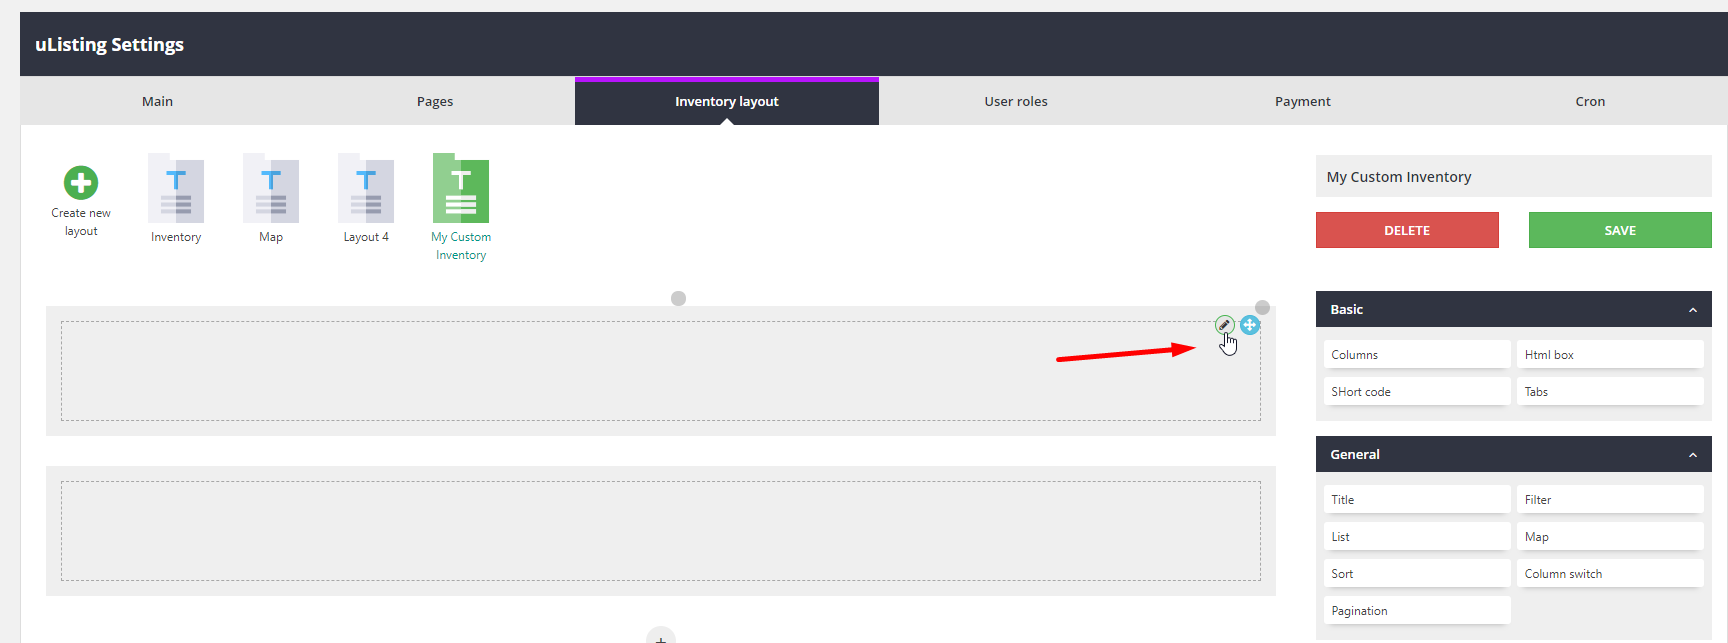
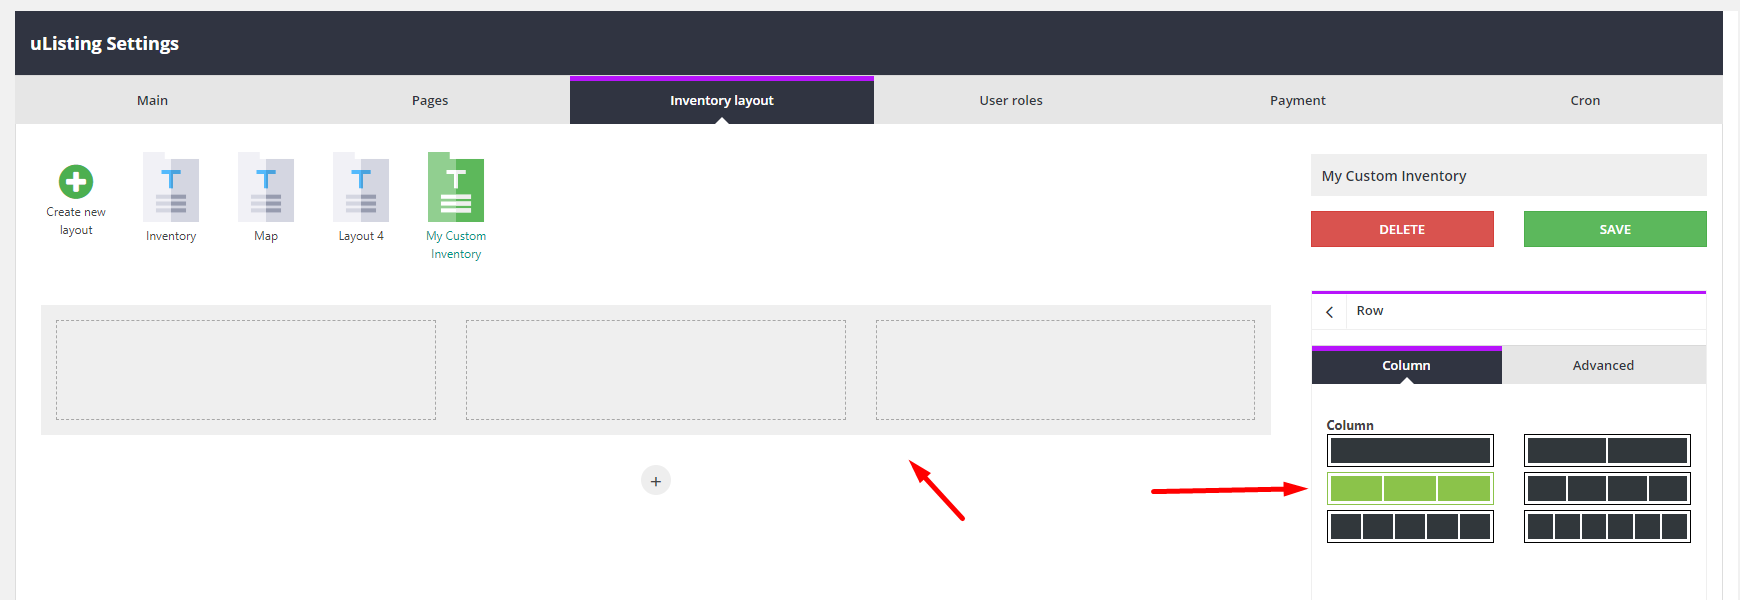
If you click the edit button here, the row column settings will appear. And there you can select the column settings. If you want three columns, just select 3, and the column will be divided into 3.
But we do not want it now. We want to add a column first. Let’s do it. Just drag this element to the section.
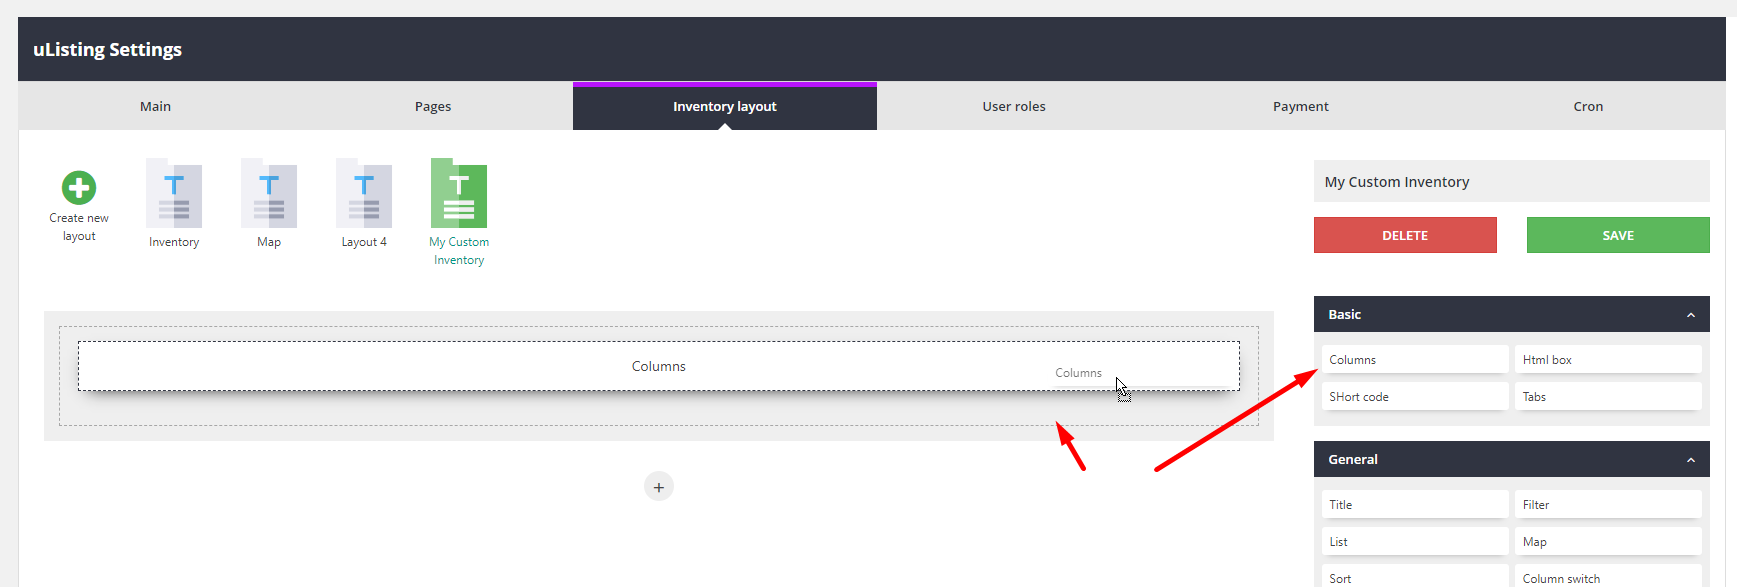
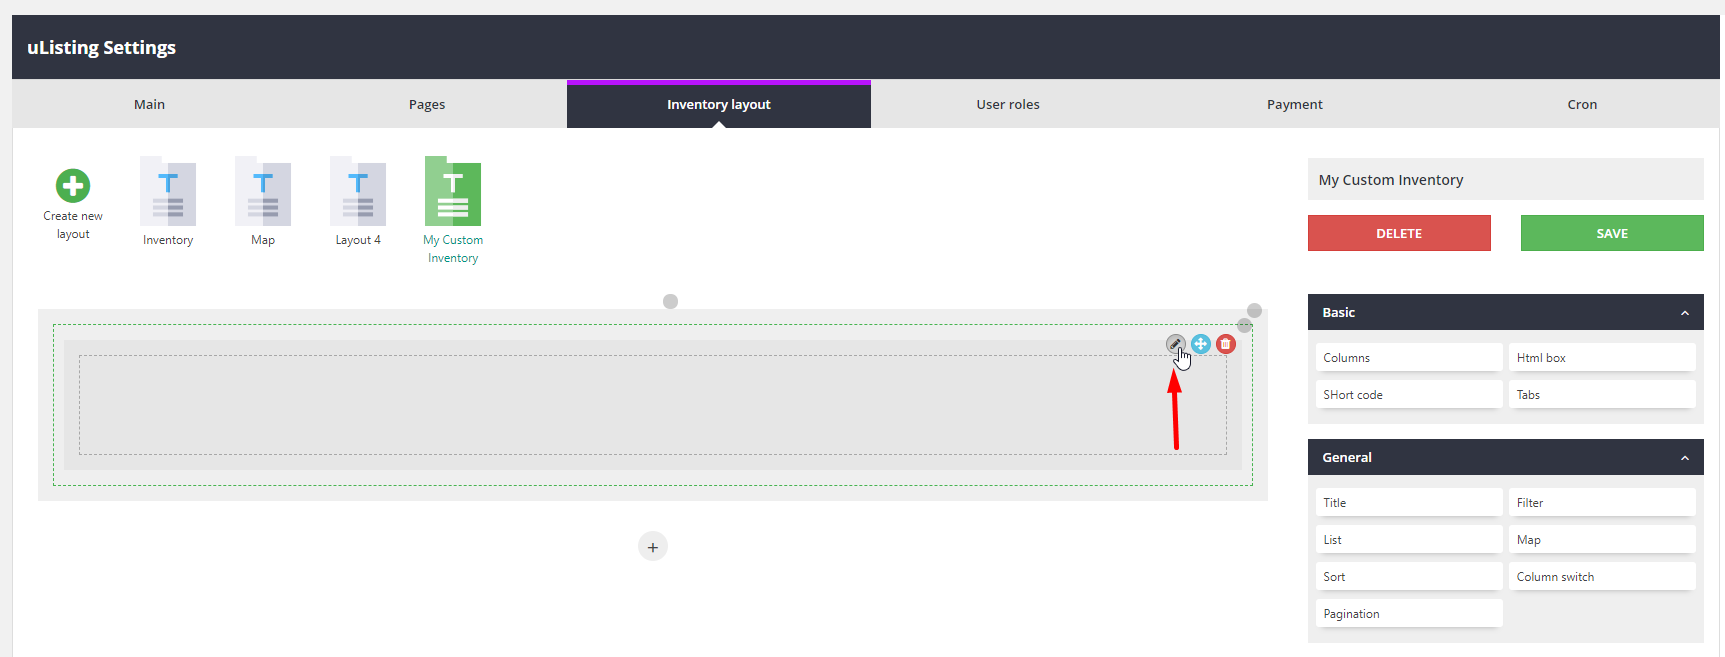
Now we have a section in which there are columns, so now click the edit button that you recently added. And select your choice to split the columns. In my case 3. I mean that I want to split a column into 3 parts.

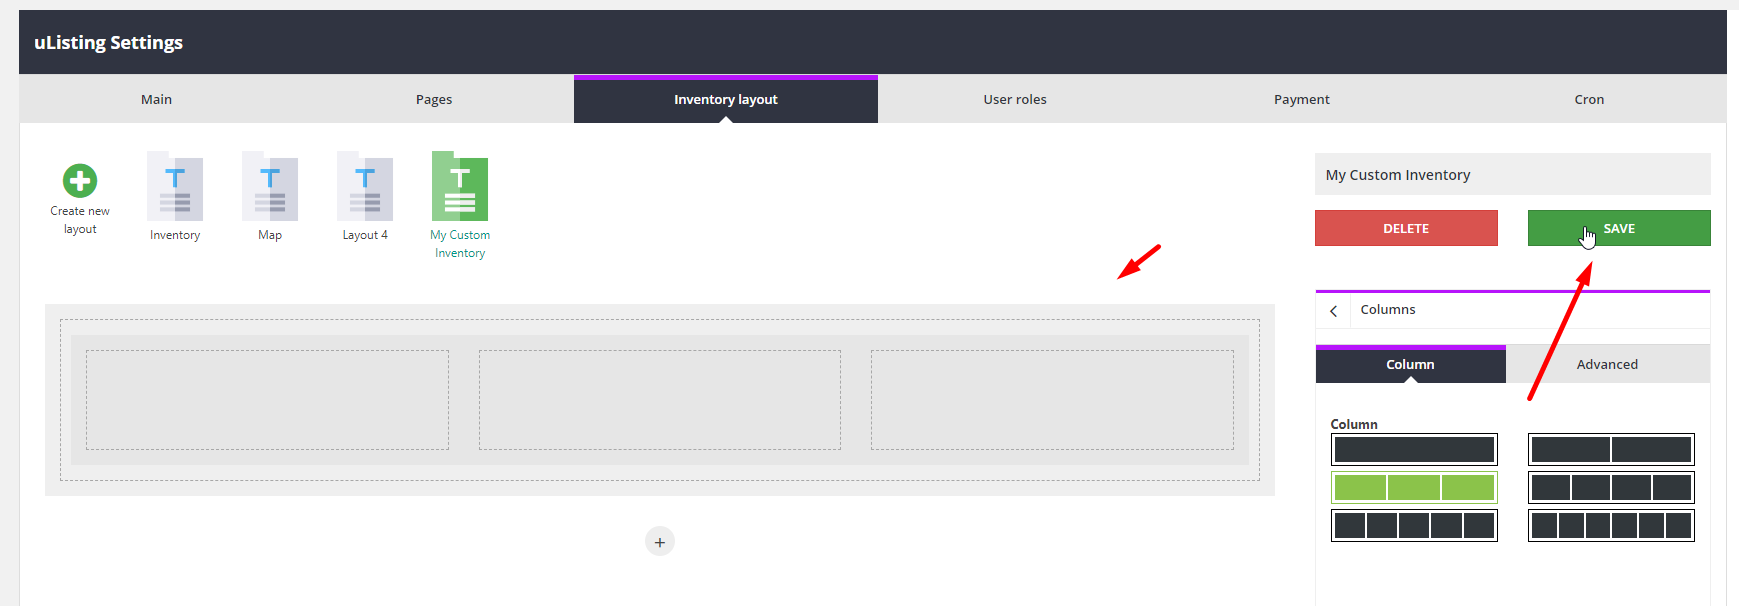
Then click the Save button to save the changes. if you fail, repeat this repetition carefully.
Now we will add another one columns.
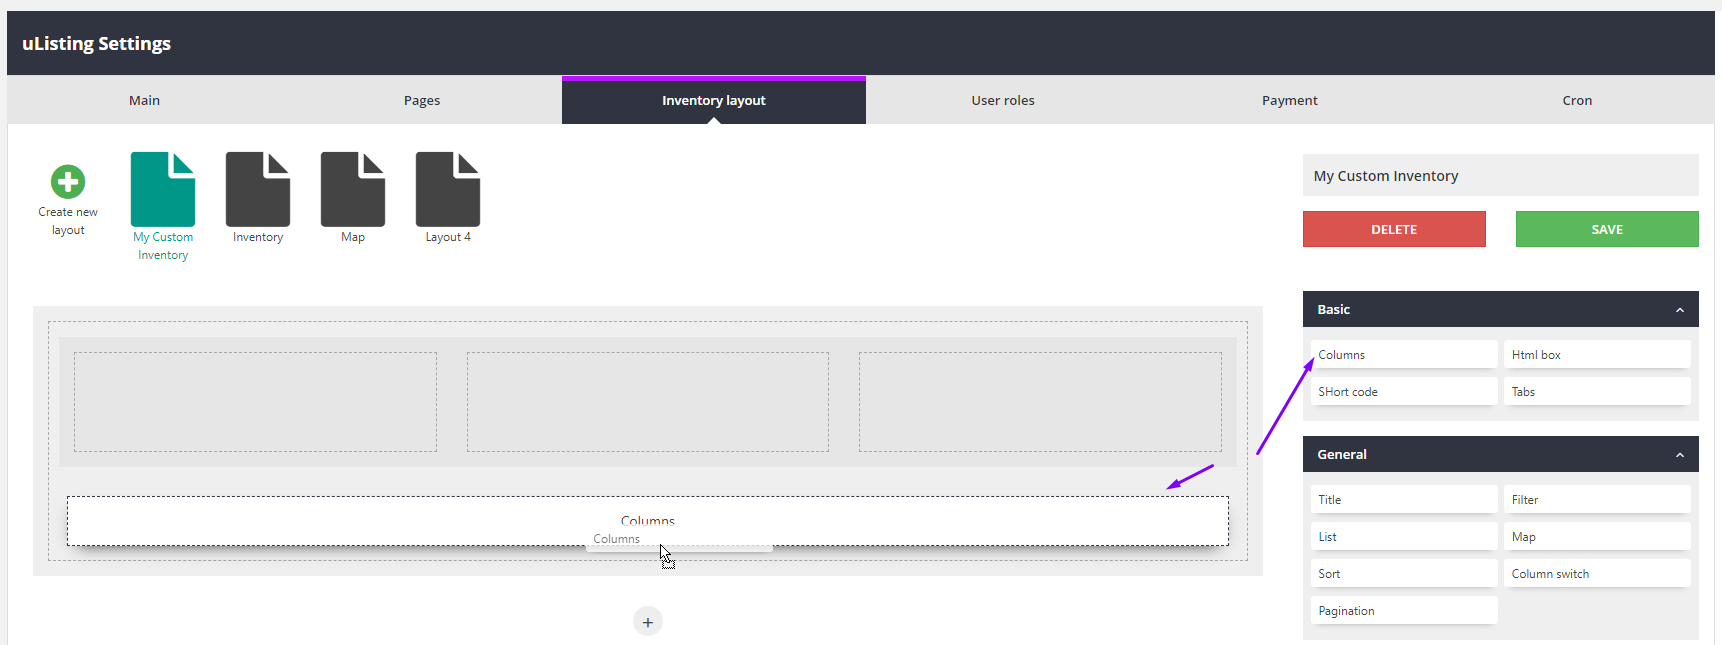
Here I want to divide this column into 2 parts.
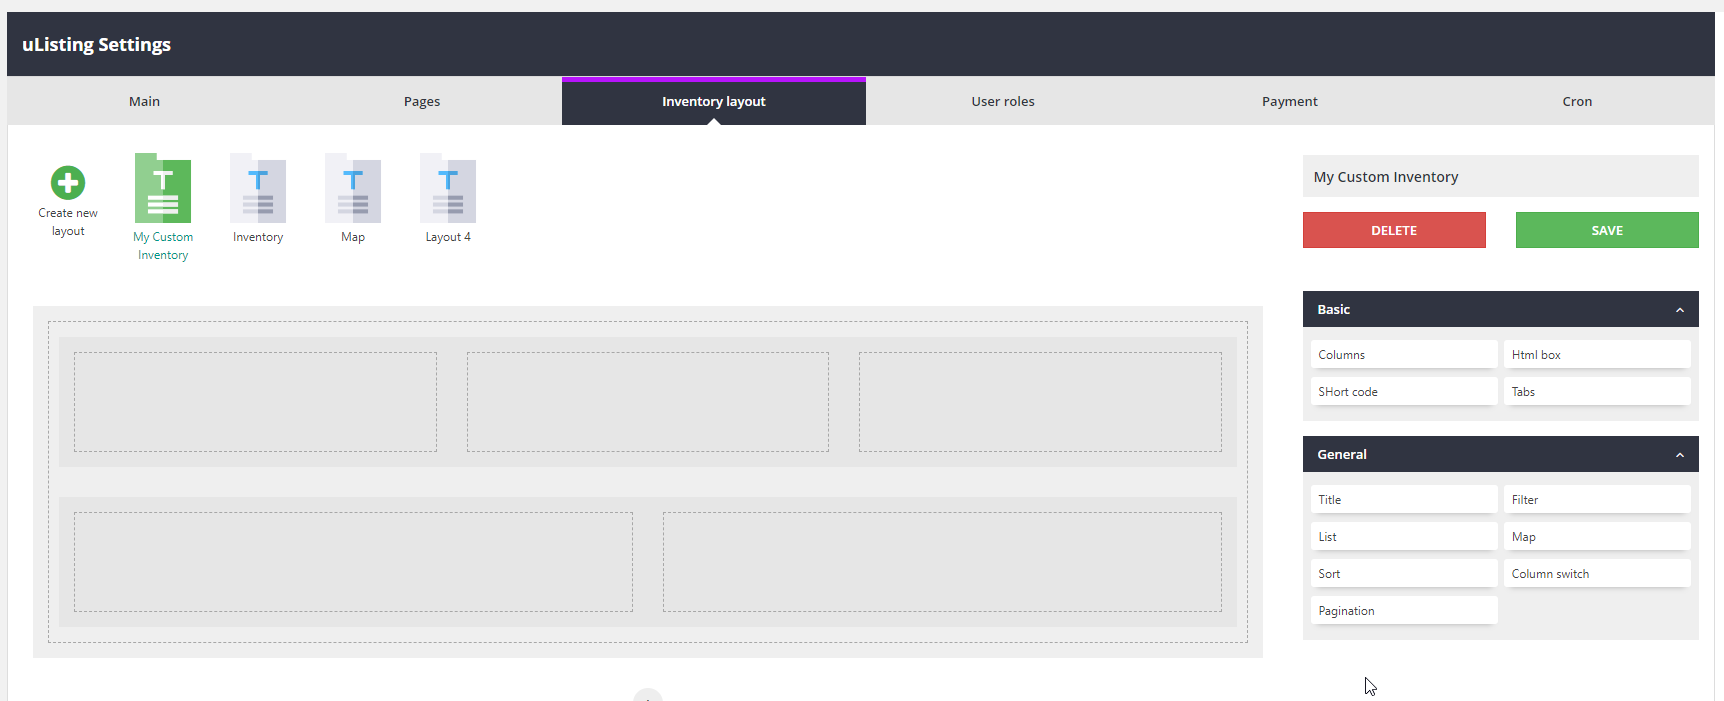
It looks great, right? But I want to resize the parts of the second column. For example, I want the size of the parts of my second column to be like this.

The columns can be divided into 1, 2, 3, 4, 5, 6 and 12. So it is very flexible. I divided one column into 2 parts. Now I want to also split the child columns. Now I have two child columns with a size of 6 columns. 6 + 6 = 12 full column size.
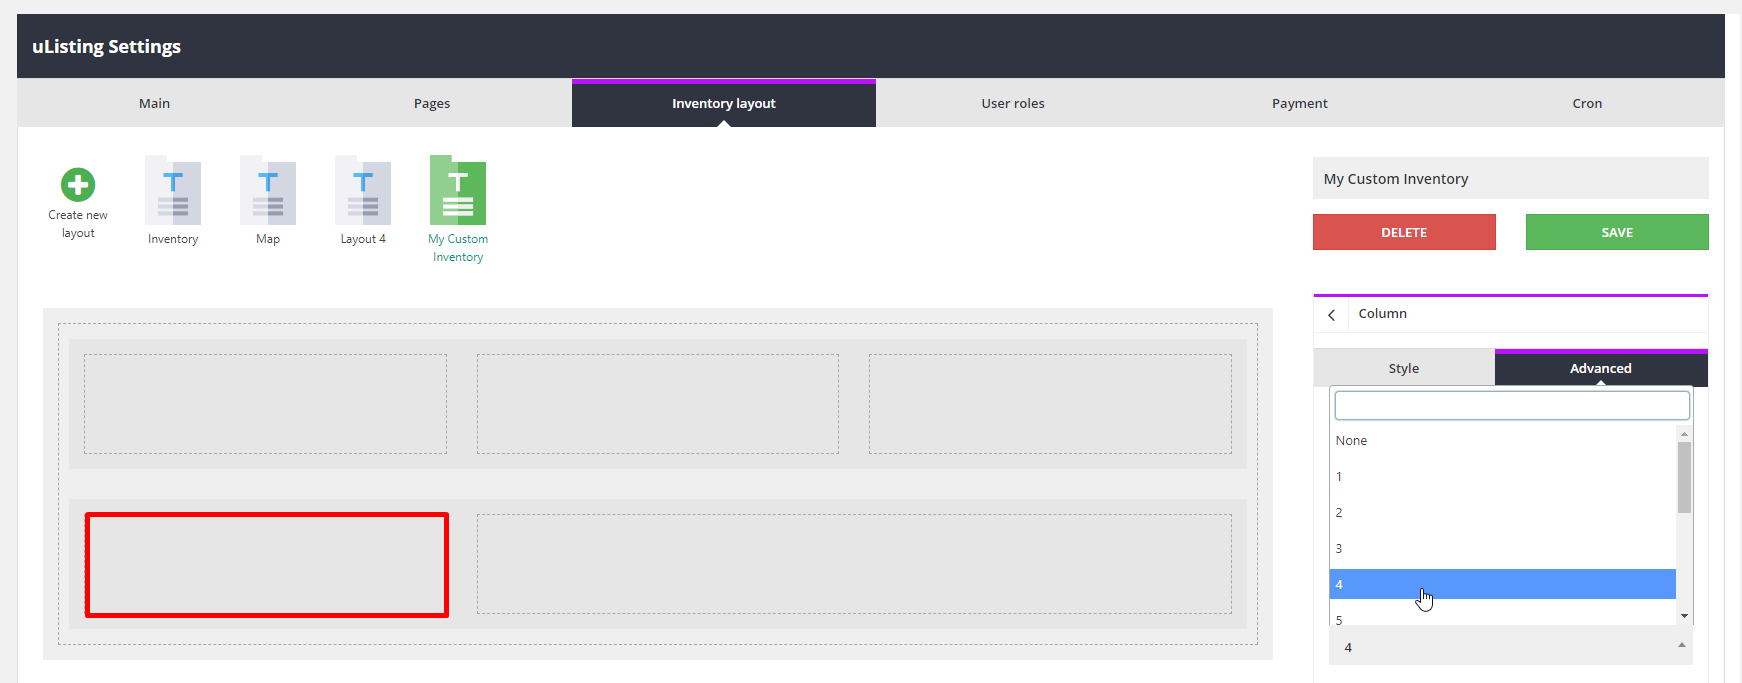
Here, click the "Edit" button and select "Advanced" tab, and here you can see the size of the columns by clicking to the drop-down.
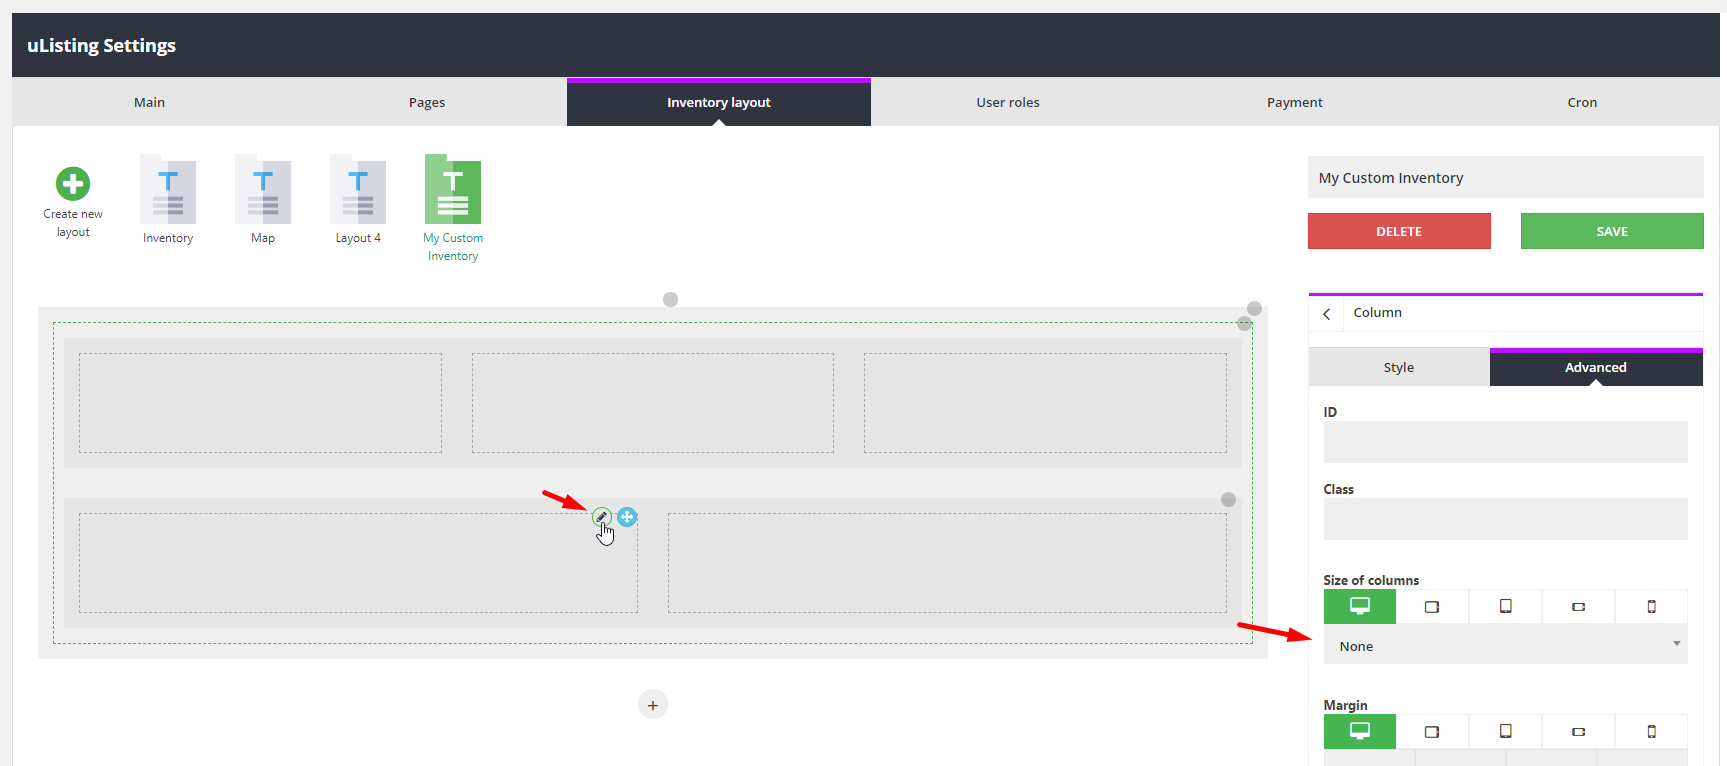
Now I changed the size of this part to 4.
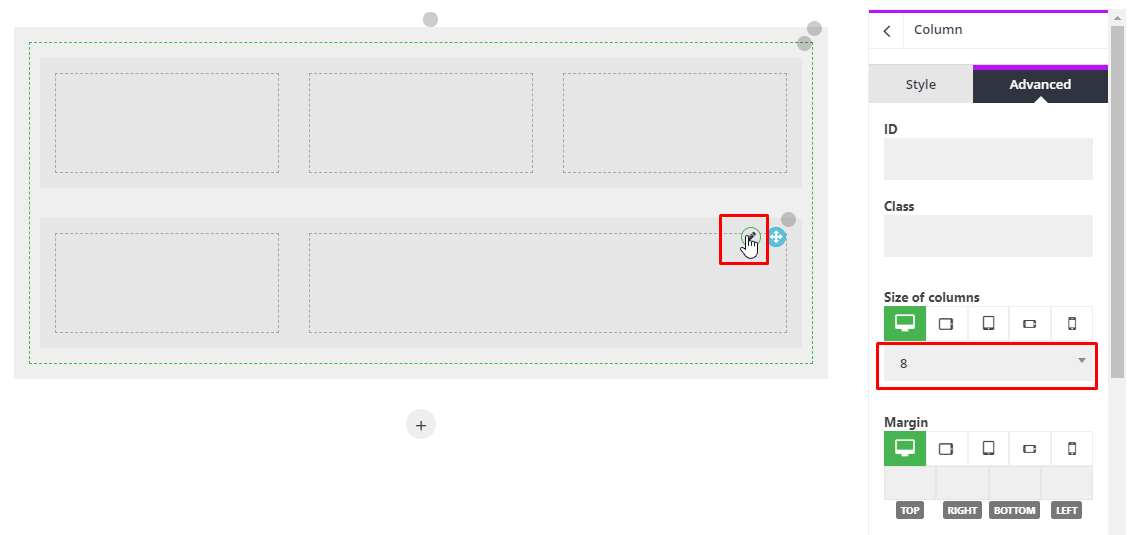
And this part to 8.
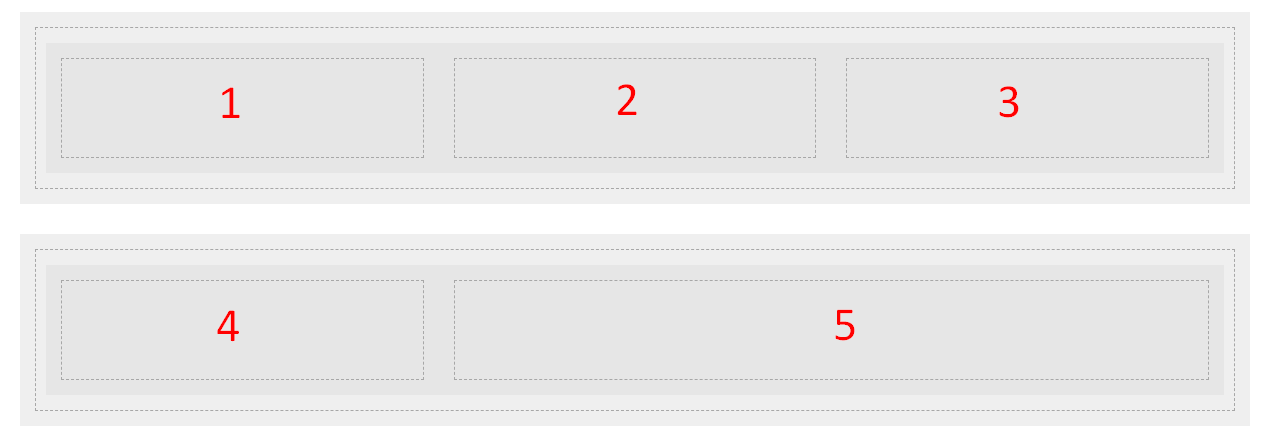
And here we will add these elements.
Title
Html view box for viewing text, Column Switch
Sort
Filter
List, Pagination

After adding the title, you can click the edit button to see the title options
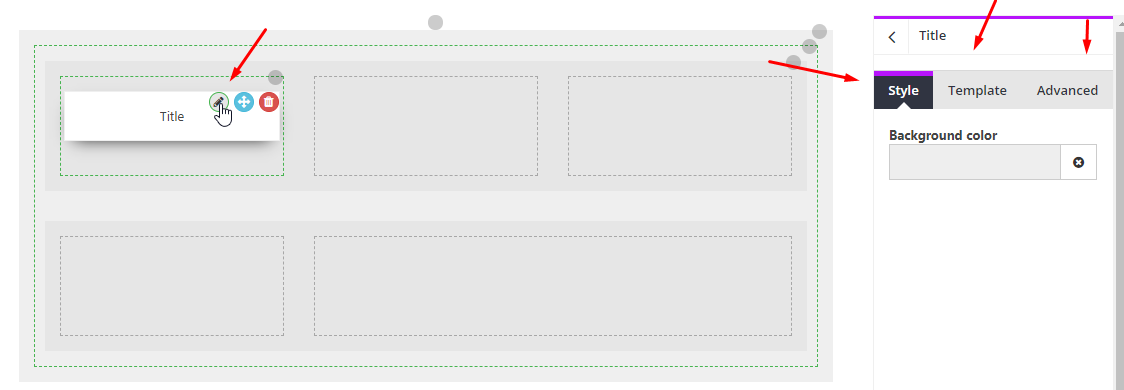
You can change the background color or padding, margins for different screen sizes, and you can choose a template style. Now select template style and click save.
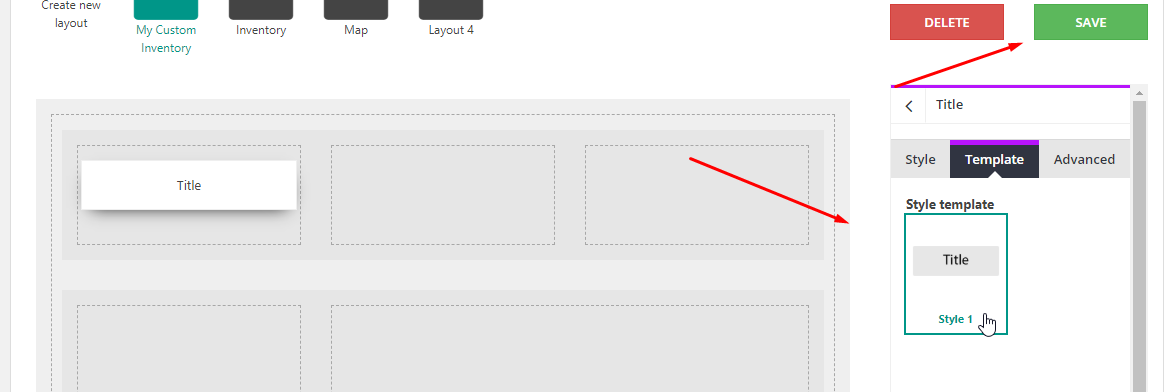
drag the rest of the requirement 5 elements that I recently told you.
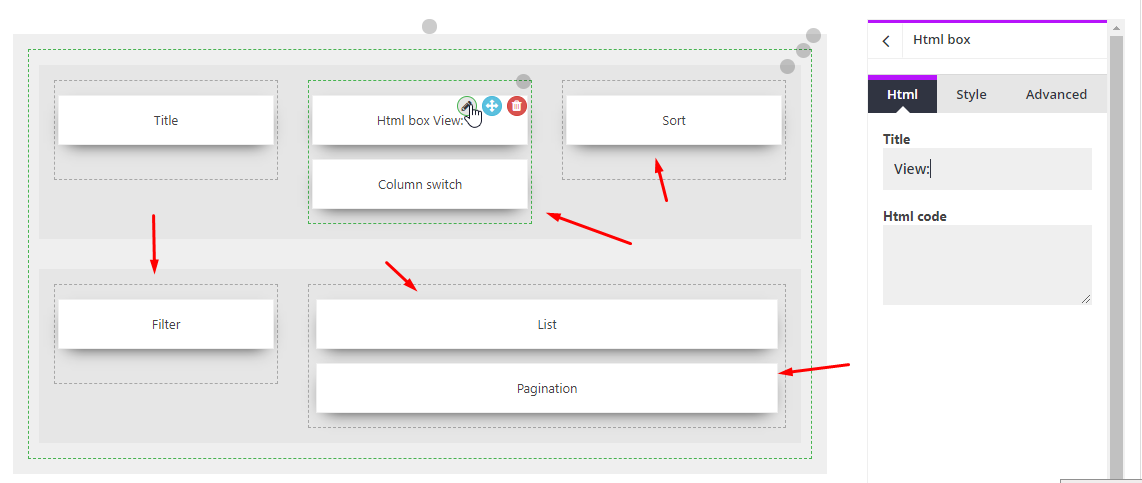
Select template styles for each element.
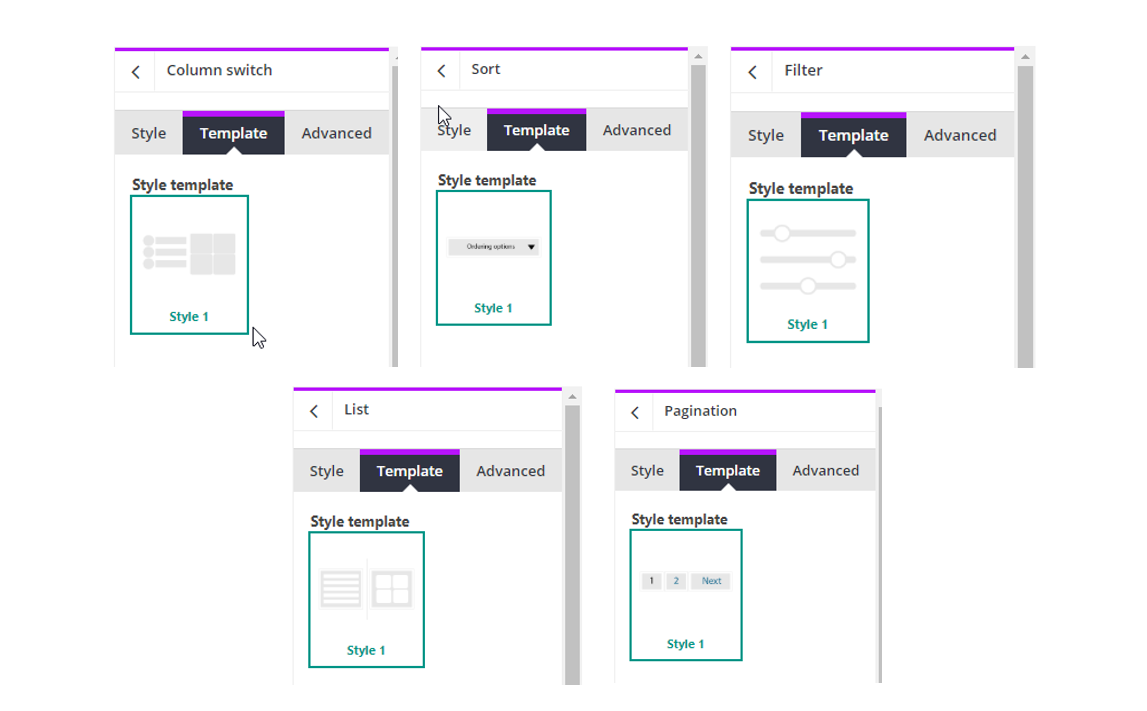
After that, click "Save button" to save the changes. Now our first custom inventory layout is ready. Let's make the settings for the payment gateway.
Last updated
Was this helpful?