Set up Header
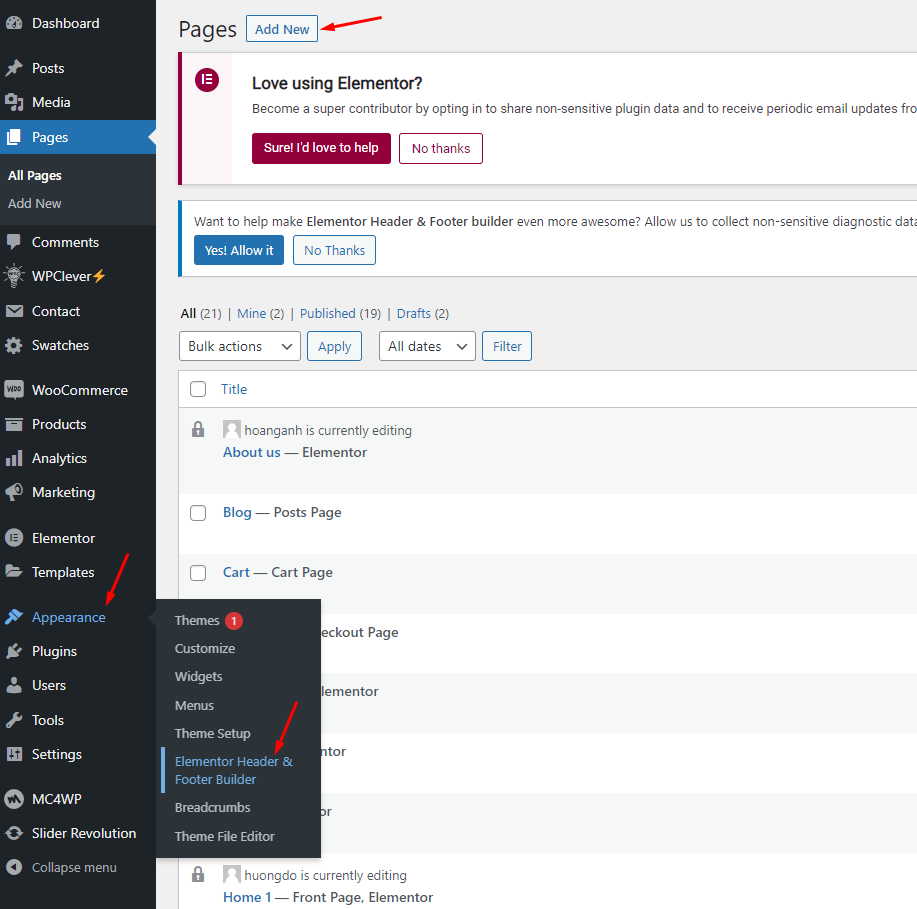
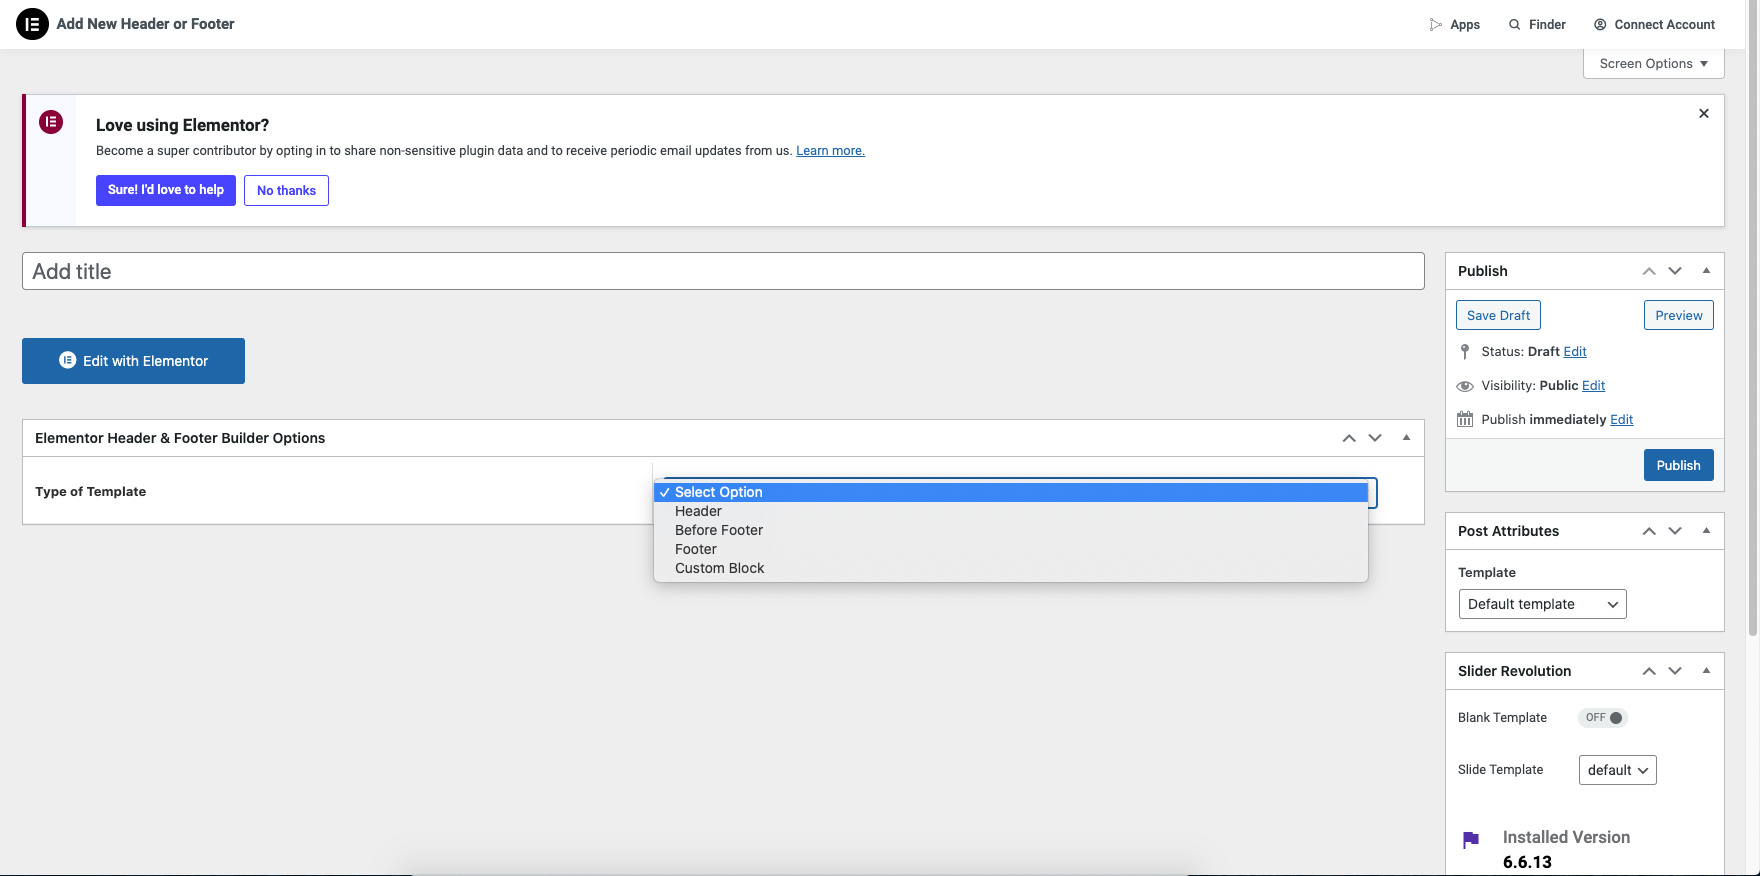
Step 1 - Go to WordPress Dashboard -> Appearance -> Header & Footer Builder -> Add new -> Edit with Elementor

By bringing the power of the Elementor editor to the header/footer areas, you can design them any way you like, full-width included, and be able to complete projects faster than ever. You can also save header and footer templates, and reuse them on any other project.
If you are beating yourself up right now for all the hours you lost in the past over your header design, we share your feelings. From now on, with the help of Theme Builder, things are going to be much faster. Learn How To Build Headers
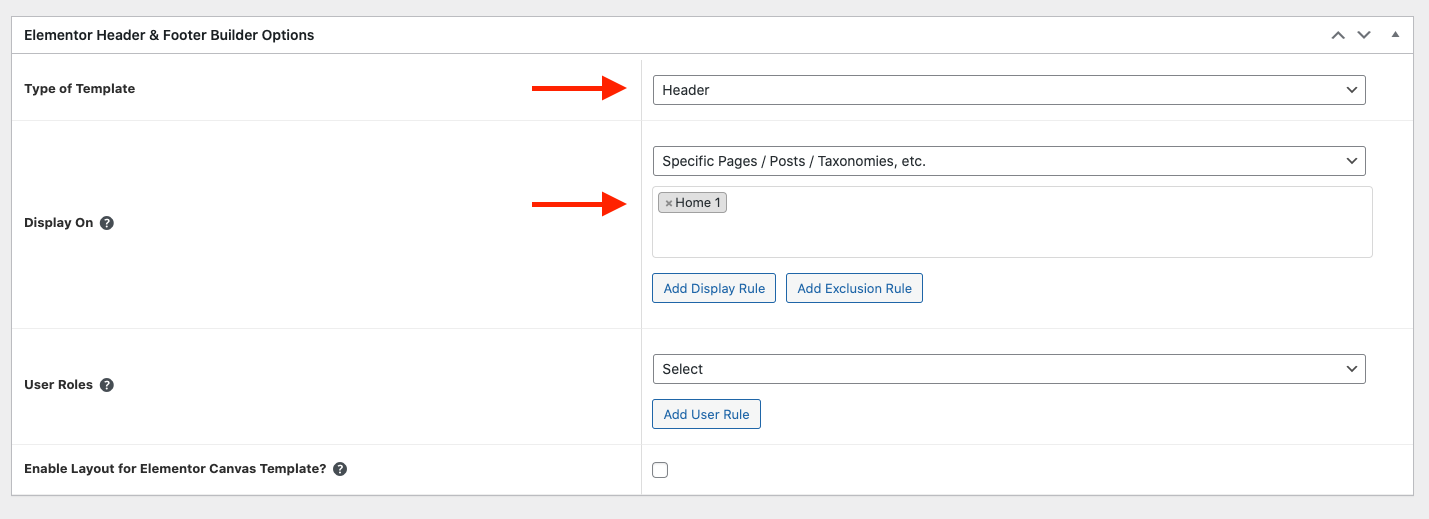
Step 2 - Click ‘Add New Template’ and choose ‘Header’
Step 3 - Name your header template and click ‘Publish’

Step 4 - Create one from scratch.
Step 5 - Menu

Step 6 - Edit the "Logo" for the shop

Step 7 - Edit Header Group

Step 8 - Edit Search form

Step 9 - Edit Menu Canvas Mobile

Step 10 - Once you have made the needed changes to the header design, click ‘Update’, and choose where to Display Conditions.
Step 11 - Set the conditions that determine where your Header is. For example, choose 'Entire Site' to display the header across your site.

Step 12 - Click "Save and Close"
Last updated