Set up Menu
Step 1 - To access the back end of your WordPress website, you need to log in to the WordPress Dashboard.
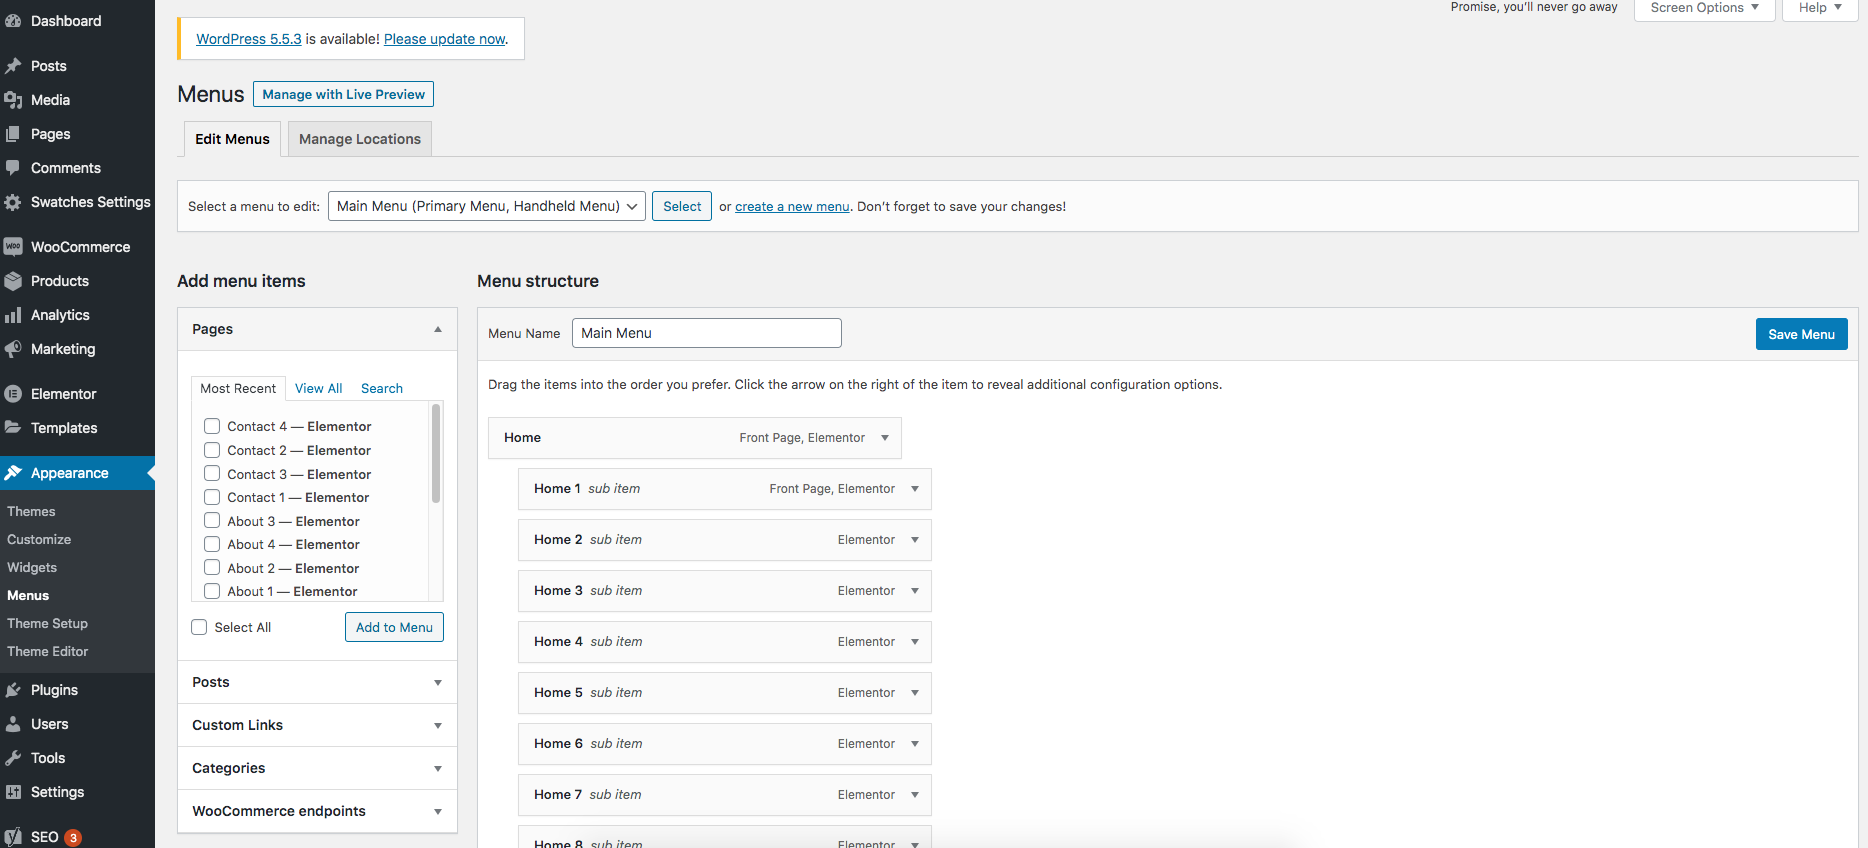
Step 2 - Access the Menu Editor by selecting 'Menus' from the 'Appearance' menu on the Dashboard's left-hand side.
Step 3 - To create a new menu, please select the option "Create a new menu" at the top of the page.
Step 4 - Enter a name for your new menu in the Menu Name box.
Step 5 - Click the "Create Menu" button. You can now add pages to your defined menu.

Step 6 - Select the pages you want to add by checking the box next to each page title.
Step 7 - Click the "Add to Menu" button at the bottom of the pane to add your selection(s) to the menu you created in the previous step.
Step 8 - Please provide the information for the menu that you would like to be displayed.
Step 9 - Assign menus to multiple Theme Locations.

Step 10 - Once you have added all the menu items you want, click the Save Menu button to save your custom menu.
If you want to know more, please watch our video guide: "How to Create Menu by Elementor "
Last updated