Set up Footer
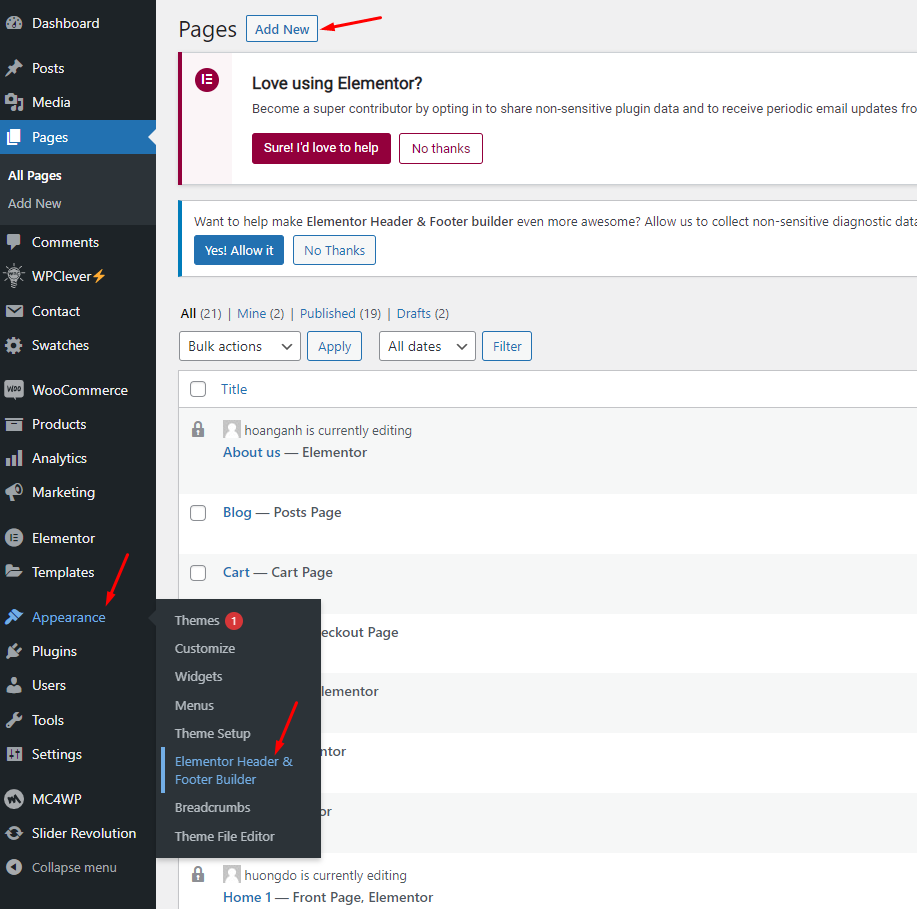
Step 1 - Access the WordPress Dashboard, go to Appearance, and click on Header & Footer Builder. Add a new section, then edit it with Elementor.
Design header/footer areas of your website using Elementor editor, including full-width layouts. Save templates and reuse them on other projects. Faster completion, consistent design.
"Regretting the hours lost on your header design? With Theme Builder, expect faster results." Learn How To Build Headers
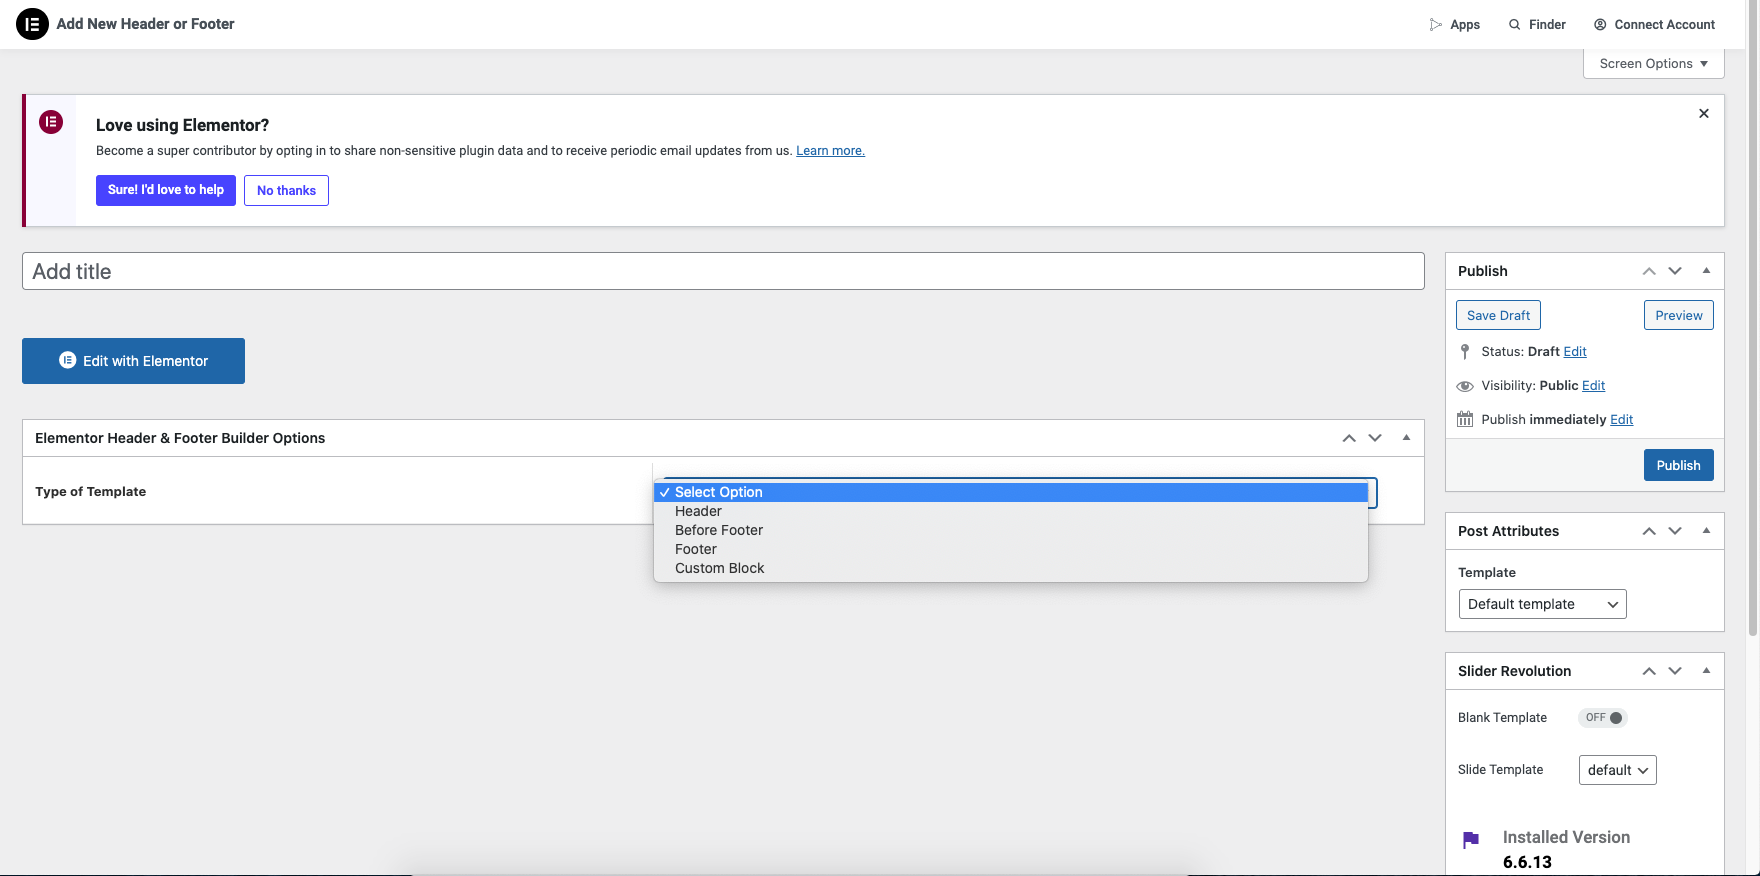
Step 2 - To add a new footer template, click on the 'Add New Template' option.
Step 3 - To create a header template, you need to give it a name and then click on the 'Publish' button.
Step 4 - Drag or drop the element that you want to build your footer template style with an unlimited layout.
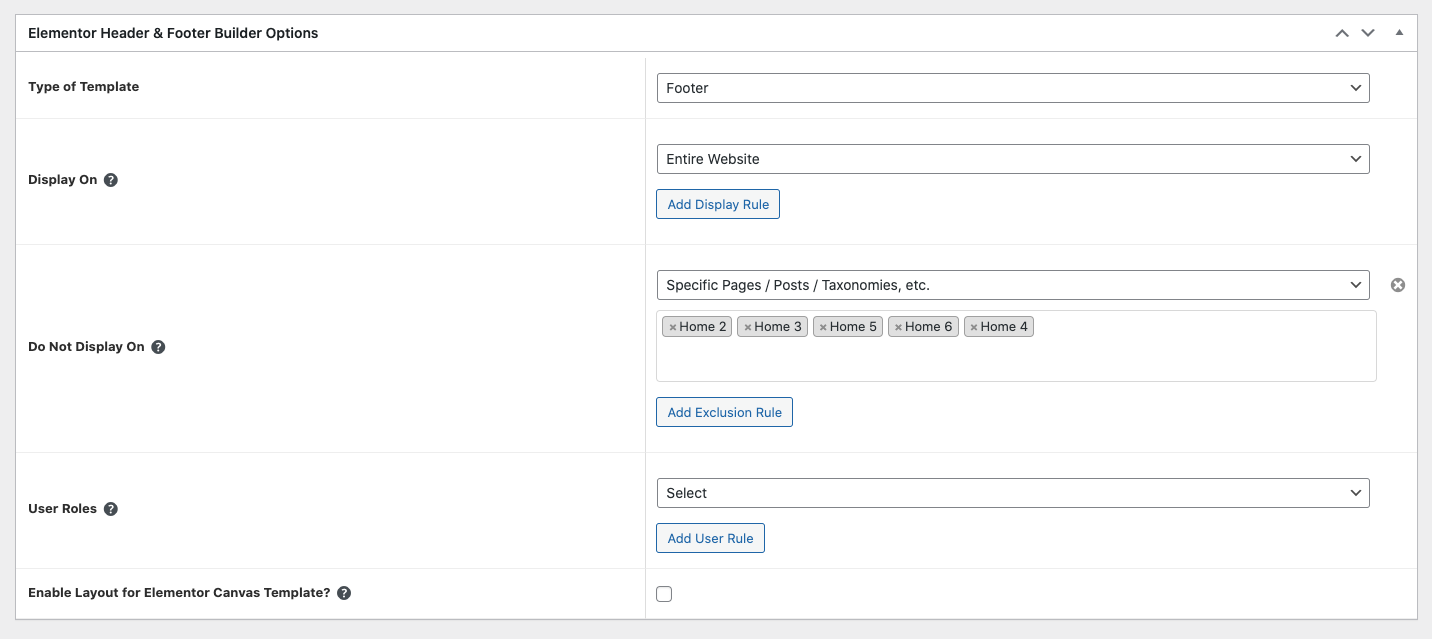
Step 5 - Once you have made the needed changes to the header design, click ‘Update’, and choose Where to Display Conditions.
Step 6 - Set the conditions that determine where your footer is. For example, choose 'Entire Site' to display the header across your site.
Step 7 - Click "Save and Close"
Last updated