Set up Header
Step 1: Go to WordPress Dashboard > Appearance > Header & Footer Builder > Add new

- Add new > Edit with Elementor


By bringing the power of the Elementor editor to the header/footer areas, you can design them any way you like, be full-width included, and be able to complete projects faster than ever. You can also save header and footer templates, and reuse them on any other project.
If you are beating yourself up right now for all the hours you lost in the past over your header design, we share your feelings.
Step 2: Menu
You can edit Header by Elementor and check widget the same:
You can add "Konsulix Nav Menu" widget and choose Main menu from dropdown list:

Step 3: Edit "Logo" for the shop

Step 4: Edit Menu Canvas Mobile
You can choose a style layout the same:

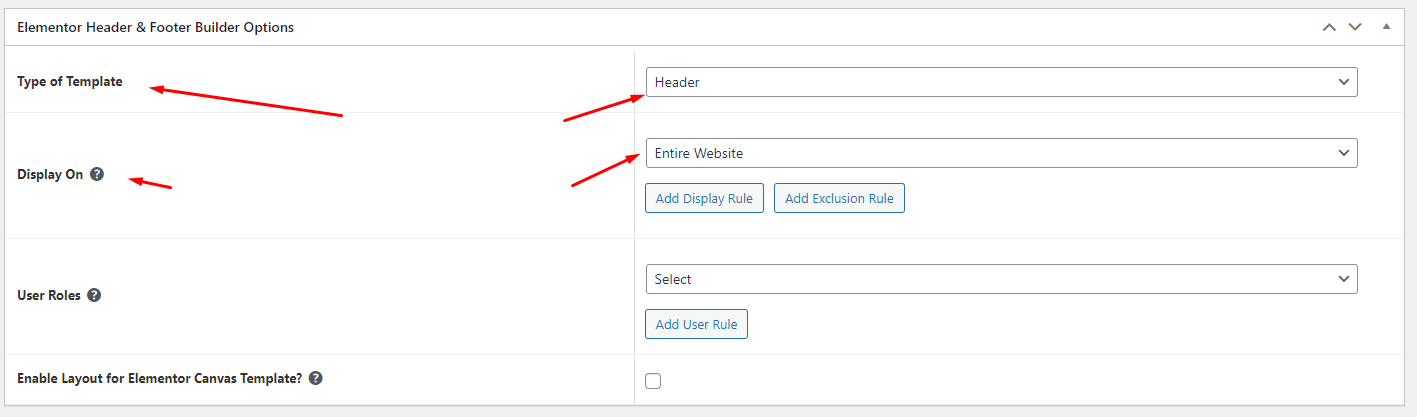
How are Conditions Displayed?
Choose tab Header Footer & Block and you can add the template that has been created to the page.

Edit the display of your Header Footer & Blocks Template that can add the created template to the page.
Click SAVE & CLOSE
Last updated