Amoja
  • Introduction
  • Support
  • GET STARTED
    • Requirements
    • What’s Included?
  • DOWNLOAD AND INSTALLATION
    • Download
    • Install Theme and Active
    • Plugins installation
    • One Click To Import Demo
  • CONTENT MANAGEMENT
    • Set up Menu
    • Set up Header
    • Set up Footer
    • Set up Homepage
    • Blog
    • Elementor config
  • BA Book Everything
    • About plugin
    • BA Settings
    • Setup environment
    • Order management
  • SETTING
    • Breadcrumb
    • Color
    • Typography
    • Button
    • Layout
    • Logo
    • Template
  • FAQS
    • How long time get Support
    • How To Submit Ticket
  • RECOMMENDATION
    • Optimize WordPress
    • Translation
    • Changelog
Powered by GitBook
On this page
  1. CONTENT MANAGEMENT

Set up Header

PreviousSet up MenuNextSet up Footer

Last updated 6 months ago

Step 1 Go to WordPress Dashboard > Theme Builder

Step 2 Click Add New, choose Header, and add header title.

Step 3 Menu

Step 4 Logo

Step 5 Button

Step 6 Full screen menu

Step 7 Edit Icon list

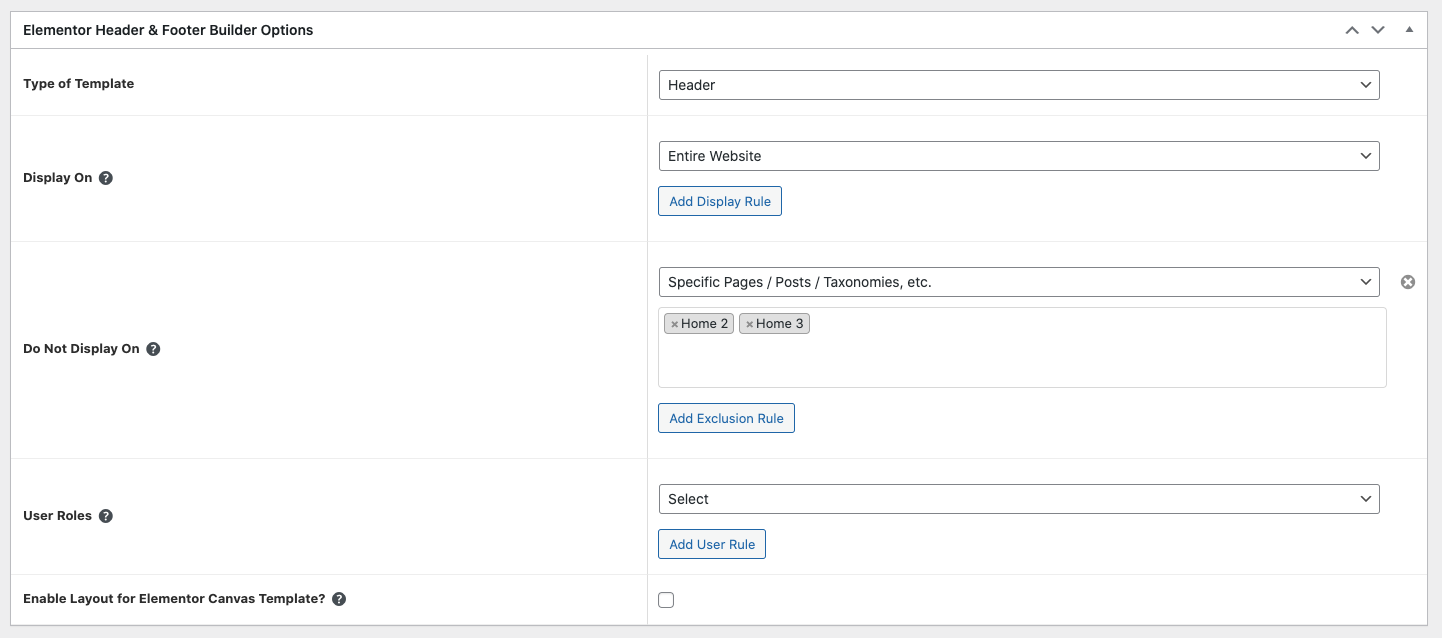
Step 8 Once you have made the needed changes to the header design, click ‘Update’, and choose where to Display Conditions.

Step 9 Set the conditions that determine where your Header is. For example, choose 'Entire Site' to display the header across your site.

Step 10 Click "Save and Close"